Friday, March 2, 2012

The Jacket that Wears Me

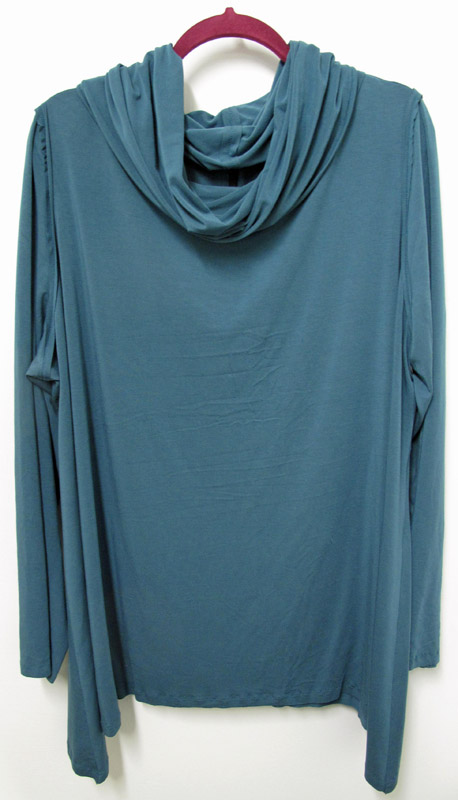
You know when you make a pattern you think will look terrific on you, with fabric you really like, only to end up with a garment you don't wear? That was my experience with this jacket. I love the softness and color of the fabric and I love the design of the pattern. But the two are not a happy marriage, and I when I wear the jacket, I feel like it is wearing me.
The styling of Katherine Tilton's Vogue 8778 appealed to me from the very start. Asymmetrical zipper, dolman sleeves, and a gorgeous, huge collar. What could possibly go wrong?
Vogue 8778 Pattern Envelope Photo
What went "wrong" was my choice of fabric. It's a luscious organic soy and cotton french terry from Sawyer Brook. The color is *me*, the hand is soft, and I thought it would work great for this design. An email conversation with Katherine helped me realize my fabric was too drapey and clingy. The pattern needs a fabric with more body, like a fleece, so the collar will stand up a bit and lie smoother. Here's what Katherine wrote (posted here with her permission):

"My guess (without seeing and feeling the actual fabric) is that the soy/organic cotton/spandex is too soft for the collar to stand up. Probably fusing a lightweight knit interfacing would help if you do another one in a similar fabric. The rust fabric used on the pattern envelope was heavy and had a lot of body so it holds a 'stand'. The orange and grey fabrics are softer but when they photograph them the collar only has to 'stand' for a moment and in actuality probably looks more like yours in real life. If you overlap the ends and close with a pin (I do this with one of mine), or add a button and buttonhole (I've done this too) it creates more of a frame for the face which at my age I'm finding flattering."

In addition to being too soft, the fabric is also clingy. No more so than the RTW french terry hoodie I'm wearing right now, but just not the best choice for this pattern. My husband tried to straighten the jacket as he photographed me wearing it, but it still managed to cling to itself, the shirt I wore underneath, and my butt.
Katherine's idea of interfacing the collar is a great one. I think it would have given the terry enough body to hold itself up better. While constructing the collar, I decided to "favor the fabric", to prevent the edges from curling up. I trimmed just a 1/4" or so from the bottom edge of the undercollar. This was an unnecessary step that actually made the edge curl under, as shown in the above photo. (I'm not beating myself up about this, just mentioning it in hopes it will prevent someone else from making the same mistake!)

The pattern calls for a second fabric for the sleeves, but I chose to use the reverse side of the terry instead. I did this on the collar, too. It adds some nice texture to an otherwise smooth garment face. I found the pattern sleeves to be drafted too long. I wanted the seam joining them to the body of the pattern to stay above the elbow, as pictured on the pattern envelope. The seam fell below my elbow, so I cut off about 2". Even with that, I needed to shorten the lower sleeve an inch or so. I also added a bit of width to the sleeves, as they are drafted quite narrow.

Two details that were really fun to work with were the zipper and topstitching.
I knew I would be wearing navy or dark blue tops with the jacket, rather than black. Wanting some contrast, I chose a navy zipper and topstitching thread. To add even more interest, I used twin needle stitching throughout. I like the raised ridge it creates.
When it came to topstitching nice corners on the collar, I was puzzled at first. How was I going to turn the corner? First I thought I would drop one of the twin needles, but then I remembered they're on the same shank (this was twin needle stitching, not cover stitching). Knowing no other solution, I broke the stitching at each of the four corners, leaving long threads.
I removed stitches as necessary and hand sewed each thread to create proper corners. I'm pleased with the result.

 If anyone knows of another technique to achieve this effect, I'd love to hear about it! A front corner:
So, why don't I wear this jacket? Mainly because it just sort of hangs on me. I added a couple of inches too much to the length and the width of the jacket. That, plus the dolman sleeves, make it rather boxy in shape, which isn't flattering to me. Also, while I love the diagonal zipper when it's closed, the jacket doesn't look good at all when it's unzipped. I've worn it a few times, and on each occasion, I felt like the jacket was in control of me, rather than the opposite. I prefer garments that I can put on and forget about. This one demands my attention too often. I think it will end up being an around-the-house layer, as it's very comfortable and warm.

Having said all of this, I still would recommend the pattern to those who like the styling. Just be sure to use a fleece that will stand up on its own, and not wear you!


P.S. We've had a mild winter, but no way does my back yard look like this now! These photos were taken in early December. We had a storm yesterday that has the lawn buried under 6 or 8 inches of snow. No way is spring arriving early here in Massachusetts!


Monday, February 13, 2012

Dormancy

The Earth is My Wise Teacher

I embrace the wisdom of this earth. I accept my own life's seasonality in all things. I embrace my times of apparent dormancy as well as my showier seasons of growth. I trust the quiet times of apparent absence as the necessary gestation time for a fruitful future.

Julia Cameron
Heart Steps

How affirming it was to read this in my studio one day in early January! Each time I go to there to create, I meditate for a few minutes, to ground myself and to clear out whatever energy doesn't need to be there, allowing space for necessary energy to enter. Then I read an affirmation from Heart Steps, a companion to Julia Cameron's wonderful Artist's Way. The readings never fail to meet me where I'm at, where my physical/emotional/spritual self is currently experiencing life. This affirmation was spot on.

My writing self has indeed been dormant for the past couple of months. My sewing self has been in partial hibernation. My creative spirit has preferred to knit rather than write or sew. This happens to me a couple of times a year, in late summer and winter. It seems I am truly tuned in to the natural world, which in my part of the planet is deeply dormant right now. Even in a mild winter such as this, every living thing seems to be in sleep mode. Oh, some of the animals stir enough to forage a meal, and some of the plants show tinges of green. But for the most part, they're asleep. Their dreams are processing memories and considering possibilities, their bodies are resting and gaining strength for the renewal cycle coming soon. They are conserving energy for self-preservation. Some of them are creating new life within themselves.

When these energetically quiet spells first showed up, they puzzled and frustrated me. Why didn't I feel like sewing/knitting/creating? What was wrong with me? Why couldn't I muster the where-with-all to do something, to make something? It's what I live to do, so why don't I want to do it? As my self-evolution process has progressed, I've come to see these times are necessary for me. Just like sleep, I need them. Even though I cannot sense it, creative juice is flowing. Sometimes it feels like nothing is happening in my creative spirit, and sometimes I feel tiny sparks of inspiration there. What's important is that I honor this process - not judging it, but allowing it to be.

Lately the sparks are firing more frequently. Ideas for sewing projects are formulating, and I actually spent two productive days in the studio this weekend. Not that I've been unproductive the past two months. I hemmed a top, and I spent many hours on a vest that went wrong at every turn and now lives in a bag with its scraps. I finished knitting a shawl I started nearly 10 years ago. It's the autumn-toned one shown in my current header photo. I knit two scarves, one easy, and one more time-consuming. I knit a pair of socks for my brother. His birthday is tomorrow - Valentine's Day. I had never knit him anything, so it felt good to make him something beautiful and utilitarian. I've taken photos of all of these things (except the scrapped vest) and will be writing about them soon.

I've missed writing here, reading your blogs, and reading Stitcher's Guild and Pattern Review. Soon I'll catch up on it all, as my creative self wakens and begins another cycle of designing, painting fabric, sewing, and writing. And knitting will eventually go dormant for a time, in preparation for its next cycle. This dormancy, this hibernation, is a necessary element of my creative being, and I'm grateful for it.


Monday, December 5, 2011

Swingy Cardi


The second garment in my mini-wardrobe for late autumn and winter, this cardigan is going to get a lot of use.  The fabric is terrific, and I can't say enough good about it.  It's a rayon/spandex ponte from Sawyer Brook, and it's a breeze to sew.  The hand is very drapey, not stiff at all, and it's very soft on my skin.  It's very comfortable to wear.  I've worn it a couple of times and like it so much I bought some of the purple, too.  The navy is sold out, but flame (a bright orange-red) and purple are still available here

I like a vee neck, collarless cardigan to layer over a variety of tops.  McCall's 6168 appealed to me for it's curved hem.  Rather than coming to a point at the side seams, the hemline is rounded.  I love how
nicely it falls:

The pattern was easy to fit, although these photos tell me I could narrow the shoulder width a bit, if/when I make it again.  I added the usual 2 to 3 inches to the length. 

I'm glad to be enthused about this jacket now that I'm wearing it, because I wasn't so thrilled as I was sewing it.  Despite the swingy cut and curved hem, the styling felt very plain to me.  I'm really craving excitement in my clothing these days, and would rather not make boring clothing.  To add some extra oomph, I topstitched it with a twin needle, rather than a single.  I liked the raised ridge created by the needles, as it gives some definition to the garment's lines.

The button style is a long-time favorite of mine at work, and it was great to finally let it add the perfect finishing touch to a garment in my wardrobe.  I like the simple yet distinctive styling of the button.  Notice how the curved lines arcing across the center of the button echo the curved lines in the garment.  Call me a button geek, but I like buttons to be in synch with the garment.  I actually had these buttons in mind when I chose the pattern for the jacket.  Ok, yes - I am a button geek!

What was really interesting to learn is how this fabric changes color in certain lighting.  Under the Ott light and at the window at work, the buttons looked like a perfect color match.  When I sat down at home to sew them on, I was dismayed to see the buttons looked very blue against the fabric.  They really didn't look good at all.  Even my husband agreed with me, and he's not super picky about matching buttons!  I discovered it was the incandescent light I was working under.  It changed the hue of the fabric, but not the buttons.  Knowing the combination looks great in daylight and under fluorescents, I decided to go ahead with the plan.

Yes, the styling of this jacket is a bit plain, and the fabric is plain, and the color is basic, and the buttons are quiet - but I love how I can change its look with a different top and accessories.  Here I am at work wearing a teal shell and a funky chunky necklace:

And for all of you jewelry and bead fanatics, here are images of the necklace.  I purchased it from a button maker at a fabric expo last spring.  It's a bit shiny and busy for my taste, but I've grown to like it.  It's perfect for upping the ante of a simple outfit.


This swingy jacket will look great with the bright pink tee I made a couple of months ago, and a coordinating scarf currently in the works.  I love wearing it with the teal Alice + Olive top and comfy jeans - a great combination.  You can bet you'll see more of it here as I add more tops to my wardrobe!

Monday, November 28, 2011

Alice + Olivia Cowl Top

I've been doing more sewing than blogging these days, for sure.  I have three completed garments that I haven't yet written about.  Obtaining good photos of me wearing my garments is a challenge.  DH does his best, but doesn't have a critical eye for seeing things that are out of place, nor does he know how to pose me for the best shots.  Oh, how I wish I lived near my professional photographer sister!  Posing for her is a delight, and her photos are the best ever!  Since we live far apart, DH's photos are good enough.


The tunic styles offered by Vogue 1261 appealed to me the moment I first set eyes upon them.  I love an uneven hemline and unusual construction techniques that result in a trendy, edgy garment.  In those aspects, this pattern is loaded.  The loose fit looked promising for my plus size figure.  I made the cowl neck version, and am very happy with the result.

The fabric is a luscious rayon jersey from Marcy Tilton.  It has good two-way stretch, which is required in this version.  The jersey doesn't curl, which was a big help in the cutting and construction processes, and necessary for smooth raw edges.  The armscyes are cut quite close to the underarm, and there are no darts, so the dual direction stretch probably helps with the fit in that area.  There are small folds under the arms, but I really didn't want to add darts, as there are so many other details in the design.  I cut the largest size, and added about an inch to the underarm seams.  I'm quite happy with the fit, although it's just a bit too wide across the chest.  If/when I make it again, I'll probably subtract a little wudth through the chest, to help draw in the fit an inch or so.

The primary design details are seams sewn wrong sides together and twin needle stitched from the wrong side.  I noticed on Pattern Review that several reviewers chose not to construct it this way, but I stuck with it and really like the look. 

I did change how the center back seam is sewn.  The instructions have you press the seams to the outside, butt the seams together, tape paper to them to stabilize the seam, and sew it with a twin needle from the inside of the garment.  This didn't really sound too stable, and seemed a bit risky, so I sewed the seam with wrong sides together, reinforced it with Design Plus fusible stabilizing tape (a great product!) and a layer of Totally Stable (another great product!) to give it stability and give enough bulk for the twin needle stitching to look good.  Since the seam was covered by interfacing and stabilizer, I drew a pencil line to guide me as I stitched.  A lot of effort, but I think it was successful.

 
I toyed with just using a zig-zag stitch on the outside, but found it was flat and I rather liked the dimensionality added by the twin needle stitching.  Removing the stabilizer was a long, tedious task that I performed in front of the TV.  It took much care, as pulling hard on it distorted the stitches.  Tweezers were an essential tool for this job!  Several layers of Solvy might have been a better product choice.

Viola, the finished seam, outside and inside:


The pattern calls for narrow ribbon to be sewn over the seam allowances, allowing the stitching to show in between.  I think that would be a great look but I knew I wouldn't find ribbon to match this fabric, so I simply trimmed the seam allowances to 3/8", and left them at that.

The reverse twin needle stitching is used on the center back collar seam, collar edge binding, and sleeve head seams.  I skipped the Totally Stable on these seams, and the stitches formed nicely.  Yards of fusible bias tape later, I finished the task.


The sleeve seams are a bit ragged because of the extra fabric resulting from easing the sleeve cap, but that just ups the funk factor.


 I love the drape of this collar.  It falls low enough that I can wear a short necklace, and it adds a bit of warmth without the close fit of a turtleneck.  Since the fabric is quite stretchy, I stabilized the neck edge with fusible tape early on in the construction process.  That prevented it from getting pulled out of shape, which would have easily occurred.

The sleeve and bottoms hems are single needle stitched 5/8" from the edge and left raw.  This was a pleasureable way to finish the tunic, as the twin needle reversed seams had taken a lot of time.  If the seams were all sewn to the inside, this would be an easy pattern to fit and sew.  If constructed as directed, the difficulty is raised a notch or two.  I'm glad I stuck with the original design, as I like wearing things that are a bit unusual.   The tunic is easy to wear, the color is soothing, and I feel very comfortable in it.  It is the first piece of my winter 6-pac, and I plan to wear it often!

Tuesday, November 8, 2011

Raggedy Linen Vest


For a long time, I've wondered if Marcy Tilton's Vogue 8430 would fit and flatter me.  When I read on her website about the linen vest she made using this pattern, I just had to try it myself.  I happened to have a small piece of navy linen from Sawyer Brook, which was just the right yardage for this garment.

I followed Marcy's directions (scroll down the page a bit) most of the way through the process.  I added darts in the armholes, to eliminate folds there.  She recommends stitching them wrong sides together, but I didn't want them on the outside, so I didn't do that.  The back, shoulder, pocket, and lapel seams are sewn wrong sides together, with her signature "cardiac" stitch covering the seam allowances.
Left Shoulder and Center Back Seams

I used a pale gray thread, not desiring the sharp contrast of white.  The stitch is easy to do, but quite time consuming, as lifting of the presser foot to shift the angle, and reversing the stitch direction is done so many times.  It made me long for a knee lift, for sure!  Fortunately, my Pfaff has an easy to use button for reversing the stitch direction.

I added a square pocket to give more detail to the garment.  I also added a seam to the left lapel, as the top of the garment looked too plain to me.  It did change the drape of the lapel quite a bit.  It no longer drapes nicely as in the top photo of this post. 

The collar of this pattern is cut very wide, so it stands away from the neck.  I think it would stand up nicely in a felted wool, which the pattern recommends using.  My neck is very short, and this collar does not stand up high, but it just doesn't fit me really well.  I'm making a scarf to wear with it, and that might help fill in the empty space between neck and collar, especially in the back.

I usually wear the vest closed with a cool shawl pin from Sawyer Brook:
I'm disappointed in the curls at the lapel corners.  I imagine a heavy or double cloth linen would not do this as much.
All of the raw edges are stitched 1/2" from the edge.  After the first washing, I had lots of raveled threads to clip.  Every now and then, another one appears, but I expect this will end after a couple more washings.
The pattern was easy to fit to my rotund shape, and I would definitely consider using it again with a more substantial fabric.
Wearing this vest is very easy, and it's proven to be a perfect layer on fall days that begin cool, then warm up a bit.  I actually wore it today with my peony top, and ended up shedding it by 2 pm.  Who knew we would have 60 degree weather in November, especially after getting 8" of snow (and 2 days without power) just over a week ago?!

Friday, October 28, 2011

Tee Times Three

Good-fitting tees are at the top of my must-have list.  They're definitely the most basic elements of my wardrobe, so I like to have an assortment available for any season or occasion.  I went in search of the perfect tee pattern for me, and found it in Butterick 5215, a Connie Crawford design.  I used it back in June, and again recently.

I was attracted to the pattern because the sizing goes up to size 6X, and it's basic styling can serve as a good starting point for my own design details.  There are three "cuts" to the pattern - close fit, natural fit, and loose fit. I used the natural fit, and I cut on the 3X lines.  The front and back shoulder widths and the sleeve widths of that size fit me very well.  It was really strange for me to not trace out the largest size of the pattern, and add more width at the side seams.  What a pleasure, to use a pattern that didn't require lots of adjustment!  I don't recall if I lengthened the pattern or not, but I do recall the pattern is cut quite long.  

My first version of this top was sewn in a cotton/lycra jersey from Sawyer Brook.  I'm hesitant to wear prints, but this one has a lot of movement, and good all-over patterning, so I went for it.
An aside:  I love cotton/lycra knits.  They don't pill, and they're comfortable to wear.  This photo was taken today, after about 10 washings, and the fabric still looks very good:

I like the sophistication of this print.  It's black and white, with small touches of blue (upper left) and taupe (lower right).  I'm really glad I used it for this top.  It was fun to wear with white capris in the summer, and carried well into early autumn with black pants.
Rather than make the top closer-fitting at the hip, I chose to leave the A-line shape.  It's a very comfortable cut, and the swingy fit makes it fun. 

The pattern description defines the neckline as a scoop, but it's really a crew neck.  I lowered it several inches for warm weather wear.  The instructions call for cutting the neckband on the bias.  I didn't understand why, as I never do this with knits, but once I tried to apply the band to the neckline, I got the picture.
This fabric does not have good stretch recovery, and the neckband sagged.  If I stretched the shirt enough to make the band lay flat, the shirt ended up gathered.  I could have recut a bias band, but I chose to create a vee neck instead.  It's a flattering style for me, and I really like the result.

(Sorry for the difference in skin tones in these photos.  They were taken on different days, in different settings, with different cameras!)

One disappointment with this pattern is the lack of bust darts.  I prefer to dart my tees, to avoid those unseemly horizontal folds that appear between the bust point and the armscye.  I added two small darts in the armhole seams on my draft of the pattern. 
This is my second version, a rayon/lycra jersey from Sawyer Brook:After washing this top a few times, I vowed I'd never buy soft rayon again.  The fabric is now so pilled I don't want to wear it out of the house!  This is one of those soft, cottony feeling rayons.  The short fibers that make a rayon jersey soft also make it pill like crazy!  Rayon jersey that has a dry hand and crepe-y feel doesn't pill nearly as much. 

On this top, I lowered the neckline and used Marcy Tilton's twisted neckband:
This was my first attempt at this technique, and I found it to be fairly easy to execute. My topstitching isn't perfect (but then, neither am I!).

My fall version is made from a lightweight organic cotton jersey from Marcy:
Since I'll be wearing it in cooler weather, I cut the neckline of the pink top a couple of inches higher (but still lower than the pattern is cut). The peony jersey curls a lot at the edges, so I decided to use this as a design element. I left the edges of the neckband raw, and let them curl.  (Once again, apologies for photos taken under different circumstances!  The color above is closest to actual.)

To sew this neckband seam, I carefully overlapped the band on the neckedge, pinned it securely, and stitched it 1/2" from the edge. The raw edge of the band curls over the stitching, echoing the other curled raw edge. To keep the seam allowance of the top flat, I pressed it toward the top and stitched 1/8" away from the edge.  I like this look, and wish I had used it on the sleeve hems, as it would have given the top more interest. The sleeve hems are simply turned under and stitched, as is the hem.  But I was tired of fussing with this top, and wanted to move on!

I'm not totally happy with the sleeve on this top.  The pattern instructions say to ease the sleeve cap before setting it into the armhole.  I didn't think this needed to be done in a knit, and I really didn't want to have to set them in.  I didn't think I needed the extra fabric in the top of the sleeve, so I lowered the sleeve head by about 1/2" to eliminate the need to ease it.  Then I sewed the sleeves into the armscyes before stitching the side seams.  Now that I see my upper arm in the photo, I realize I did need that extra fabric in the sleeve cap area.  That little bit of extra fabric would prevent the wrinkling of the sleeve above my elbow.  I hate to set in sleeves, especially in a knit, so I'll have to contemplate how to deal with this issue in future versions of this tee.

I'm not crazy about how this thinner jersey drapes around my belly.  The print jersey is heavier.  The royal blue jersey is droopier, so the drape lines fall more smoothly.  If I run into this problem again, I'll look into taking the top in at the sides.

I like the fit of this top, and I expect to continue to use it as my basic tee pattern.  Since it's a simple style, I'll probably play with other design elements - and paint! - at some point.  Even though it's plain, it beats wearing store-bought tops anytime!

Sunday, October 23, 2011

A Brief Sewing and Blogging Hiatus


Just a note to say I'm away from home and my studio for a while, visiting my parents.  My mother is having a tough time regaining strength following surgery for cancer, and we siblings have been taking turns caring for her.  I have a couple of posts in draft form, but need to get more photos taken before publishing them.  Here's Mom in her favorite place in the house, the sunroom:

She made this table back in the 70's.  It is a cedar root she found along Cayuga lake, filled with cinders from the nearby railroad bed and totally grayed by water flowing over it for decades.  It took 3 men to load it in a pickup truck to haul it home.  She thought she'd be able to sandblast it, to remove the dead, gray outer wood, but that didn't work, so she spent most of a winter scraping and sanding to bring it to the naturally colored wood.  After leveling it, she traced a pattern for the oval plexiglass and had a pice cut.  That one shattered, so she later had a thicker one cut.  Glass would be ideal, but probably quite expensive.  This is my favorite object in the house, for sure.

Dad has stepped up to the plate admirably for an 85 year old.  He's learned to wash dishes, run the vacuum, and make beds, which is quiet comical to witness, since he's never done these tasks in his life.  (He went from living with his mother to living with my mother, so he never needed to learn.)  But Mom needs supernutrition, and while Dad does his best, he's not quite capable of handling this on his own for more than a day or two.

While here in Ithaca, I've been able to get out to the yarn and fabric shops.  I made a nice fabric purchase yesterday that will undoubtedly show up on these pages in the coming months.  I brought along several knitting and hand sewing projects, so I can work at them as time allows.  It's too cold to knit on the porch, but the rockers are still there, and the sun is shining today (for the first time in days!), so I might get out there for a bit.

The pond and the treehouse, photographed on this glorious fall day:


I hope to get back to Massachusetts by mid-week, and I'm looking forward to sewing and writing about it here.  Happy sewing to all! 

Edited on 10.28, to add photos.