Showing posts with label foiling. Show all posts

Monday, June 18, 2012

Japanese Garden Tee


I've long wanted to paint a tee in a one-color tattoo effect with silk screens. This cotton/lycra jersey from Marcy Tilton nicely presented the opportunity. As I pondered colors, I realized silver paint would pair nicely with the soft coloring of the fabric.

I began by cutting out my TNT pattern for tops, Butterick 5215. (Yes, this is my second version for the PR contest.) I used the neckline as drafted on the original pattern, but after draping it on my front, I decided to lower it an inch. I should have added an inch to the side  and sleeve seams, as the fabric has just a little stretch, but I didn't think of it at the time. Fortunately, the negative ease through the bust line looks okay. But the sleeves tend to bunch up under my arms, as they're a bit too tight. Time to get those dumb bells out!

To determine the selection and placement of the silk screen images, I laid each piece out and auditioned various groupings. Once I had established the layout, I took out my disappearing chalk and drew a diagonal line from the upper right to lower left. I also drew lines to indicate where the edges of the images should fall. The fine white lines can be seen along the sides of the center image in this photo:

This chalk erases with ironing and washing. It was a great help, as each of the screens has a wide frame, and it can be tough to figure out how to align the images. Here are the screens I used for the back:

Here is the finished back. I also painted a small element on each sleeve.

To add a slight variation in the patterning, I added foil to the dragonfly images. The foil comes on thin plastic sheets. It and the adhesive it requires are available from Marcy. I also have a package by Jones Tones, but I don't recall where I purchased it. Perhaps from Dharma Trading? I see they stock it.

The foil on the left is holographic silver, and the right is silver with swirls of almost iridescent color. Funny how you can see the reflection of the camera and my hands!

The foiling process is quite easy. First, the adhesive is applied to the fabric and allowed to dry. I painted it on through silk screens, but it could be painted by hand, with a rubber stamp, or whatever. It looks like this when dry:

Once dry, the foil is placed over the image, and a hot dry iron is touched to it. Using the side of the iron to burnish the foil works well. The heat makes the glue melt and stick to the foil. Once it cools - just a minute or two is usually ok - the foil sheet is peeled off. I started with the holographic foil.
I didn't heat this long enough, so the image wasn't completely covered with foil. I decided I wanted to try the other foil. If there is still glue exposed on an image, it can be re-foiled. This attempt was more successful:

The foil sheet is clear where the foil has come off. You can see that all of the foil didn't come off. That's because the holographic foil had stuck to parts of the image. I like layering different colors of foil in this manner. On this top, I liked the swirl foil better, as it added some subtle color to the design.

Simply beautiful! Here's what the foil sheet looked like when I was finished. 

The sheet can be used again and again. On future projects, if I want just parts of an image to be foiled with this color, I can place a partially used area over the glued image, burnish it with the iron, and repeat the process with a different color. Layering the colors like this makes the image more interesting, especially when solid color foils are all one has. I really lucked out with this swirled foil. I just love the effect on this tee!

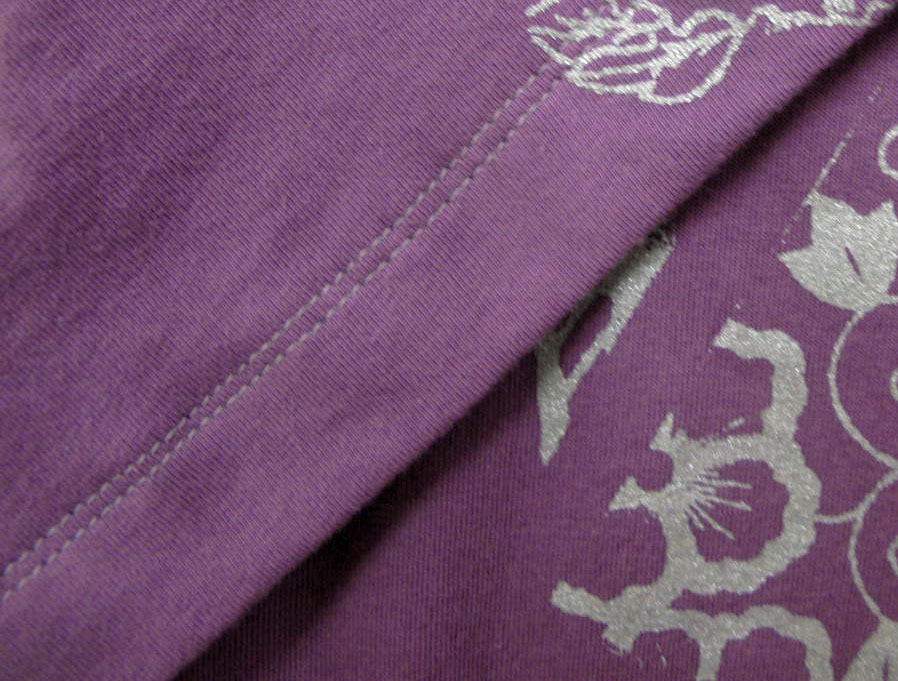
Sewing the top was very straightforward. I chose pale gray thread for topstitching the neck band and the hems. I really like how the color ties in with the paint color.

I also double stitched the sleeve and bottom hems 1/8" apart. I find this easier to do than using a twin needle. I also like the closeness of the stitching lines.
This top is comfortable and fun to wear. Now I need to make up that charcoal cotton from Marcy into a pair of capris. They would look great with this top!

Sunday, September 25, 2011

Do You Have a Shirt that You Really Love?

One that you feel so groovy in? 
You don't even mind if it starts to fade
That only makes it nicer still   (Donovan)

I'm not a 'shirt' kind of girl.  You know - the classic, woven fabric, button-down-the-front, collared, type of shirt.  This is probably because shirts don't fit my short-necked, rounded back, apple shaped figure well at all.  And they often need ironing to look their best.
Knit tops are just more flattering and comfortable, and I wear them 99% of the time.  This is my current favorite:

I made this in March, but wore it only a couple of times before the warm weather forced me to put it away for a few months.  Wearing it on a cool day last week reminded me of how good it makes me feel.  It's made from a double knit cotton from Marcy Tilton, and a cotton jersey from Sawyer Brook, both of which are very comfortable.  The double knit is dotted on one side, and striped on the other, offering many design options.  I purchased this in the summer of 2010, and will jump at the chance to buy other colorations, should Marcy ever find them.  She offered a warm-toned green (I believe) one this summer - not a good color for me, but a fabulous fabric!

The design concept for this top was born during the winter, when I was working on my SanMarDia jacket.  This plum fabric was on my design table near the trim I had painted for the jacket, and I noticed the burgundy Jacquard Lumiere paint was an exact color match.  I knew then I would be making a top using the paint on black knit, combining it with the double sided plum knit.  What a wonderful affirmation of letting fabric "age" in my collection!  I love to let a fabric rest in my view while I'm working on other projects.  It encourages percolation of design ideas.  Sometimes it gets put away for a later viewing, and other times a great idea such as this emerges.

I started with Marcy's Vogue 8497, view B, extending the front curve into a corner, and widening the neckline.  I painted it using the Plum Blossom silk screen from Marcy's Japanese Tea Garden set, and foiled it with dragonflies from her Angelic Insects silk screen.  I embellished the fabric pieces after I cut them out, in hopes of achieving good design placement.  In hindsight, I should have done the foiling after the garment was sewn, to avoid placing the dragonfly on the bust point.  (Must have been my inner stripper diva strutting her stuff!)

The plum stripe/dot fabric lent itself very well to this pattern, creating a "third fabric" for the neckband.  I used raw edges, but fused black superfine Design Plus Bias Fusible Tape to the raw edge, to prevent major stretching.
I can't say enough good things about this tape.  It has held well through several washings, and it has continued to stabilize the band edges around the neck and down the front and back of the garment.
This great pattern is an excellent candidate for embellishment and design options.  I love the ability to use two fabrics and achieve successful balance.  I made another version of this top, using the curved front piece and leaving the neck as it was drafted on the pattern. (I'll blog about it when I can get DH to take some pictures.) If I make this sharp corner version again, I'll place the corner higher and bring the neck in a bit, to expose less of my chest. I don't mind it for warmer weather, but I prefer a more closed neckline in cooler temperatures.
The overlay down the back is really stylish, too.
The hemline of one side is shorter than the other, creating a cool design feature both front and back:
The pattern is also fairly easy to grade up several sizes, thanks to the dolman sleeve design.  I simply figured how much more width I needed at the sides, then echoed the same underarm and overarm curves when I redrafted the pattern.  I might add a small bust dart next time, but the crosswise wrinkle at the bust doesn't bother me much on a dolman style.  Actual construction at the sewing machine is very easy.

I love my shirt, I love my shirt,
My shirt is so comfortable lovely
I love my shirt, I love my shirt,
My shirt is so comfortable lovely