I promised to write about the bag I made in July, but first I want to tell you about the bag I made in the past week. As soon as I finished The Bag To End All Bagmaking, sneak peeked in my previous post, I learned about a handbag contest on Pattern Review. The bag had to be made between August 1 and 15. At first I didn't think I had the reserves to make another bag right away, but with the encouragement of others and two weeks of trying to figure out what to make, I started on this:

I've had Marcy Tilton's Vogue 8590 in my pattern stash for several years. It was actually the impetus that led me to collecting silk screens and learning how to use them. I've been gathering silk dupioni pieces as I see them when fabric shopping. When I realized this gorgeous rayon batik from Sawyer Brook coordinated nicely with several of the silks, I chose it as a lining fabric and dove into the project.

First up was to cut my fabric pieces down to size to prepare for painting them. I prefer to paint before cutting pattern pieces out, as it's easier to handle larger pieces of fabric. My bag is made from 8 fabrics (the pattern calls for 9, including lining). Marcy made the cutting process much easier by grouping pattern pieces according to which fabric they're to be cut from. Here is a sample panel:

The pieces are drafted on the same grain line, so you can simply lay the panel over the fabric and cut the pieces out. This is what I did, with the exception of two fabrics that were small and required the pieces to be placed closer together in different arrangements. To make placing the painted images easier, I drew an outline of each piece on the dupioni using a disappearing chalk. Here is one of the painted panels, before the pieces were cut out:

When selecting which silk screen images to use, I considered the lining fabric. It spoke to me of fields of sunflowers and blazing bonfires at sunset. The sunflowers led me to Provence, and the French Holiday Bag was given its name. I used images culled from French culture - a fleur-de-lis, the Eiffel Tower, a letter written in French, a labyrinth from Chartres - as well as natural elements such as a singing bird, a nautilus shell, honeycomb, a bee, and a hydrangea.

Painting these pieces was lots of fun. It was challenging to keep in my head which colors of fabric would be adjacent to one another in the finished bag, so I could choose paint colors accordingly. I used 7 colors of Lumiere that echo the colors in the fabrics.

Construction of the bag went smoothly, with one exception. The interfacing was a Goldilocks affair. The first was too stiff, the second was too limp, but the third was just right.
I started by fusing Acro, a very stiff tailoring interfacing, to all of the outer pieces. After sewing the sides of the bag together, I realized there was no way it was going to gather well when the elastic was inserted into the front and back. it was just. too. darn. stiff. Out came the seam ripper and the seams, and I peeled off all of the interfacing.
My next choice was Armo Weft, a weft-insertion interfacing that gives soft stability. After fusing it, I knew this would gather nicely, so I moved forward and sewed the outer shell of the bag. And it had very little body.
Sooooo, I added a layer of Form-Flex, a woven fusible that had just the right amount of oomph.

The left side with Form-Flex. Nice and stiff, as opposed to the opposite side! It fused nicely over the sides of the bag, even though the seams had been sewn. After fusing, I stitched the Form-Flex to the seam allowances, to keep it in place. Not the proper method of applying interfacing, but no way was I ripping the seams out again.

It stands up! Much better.
The bag has four pockets - one on each outside end, a zippered one inside, and an open double pocket inside. I used the zippered one as drafted, but cut the other one longer, and made two small tucks at the bottom edge.
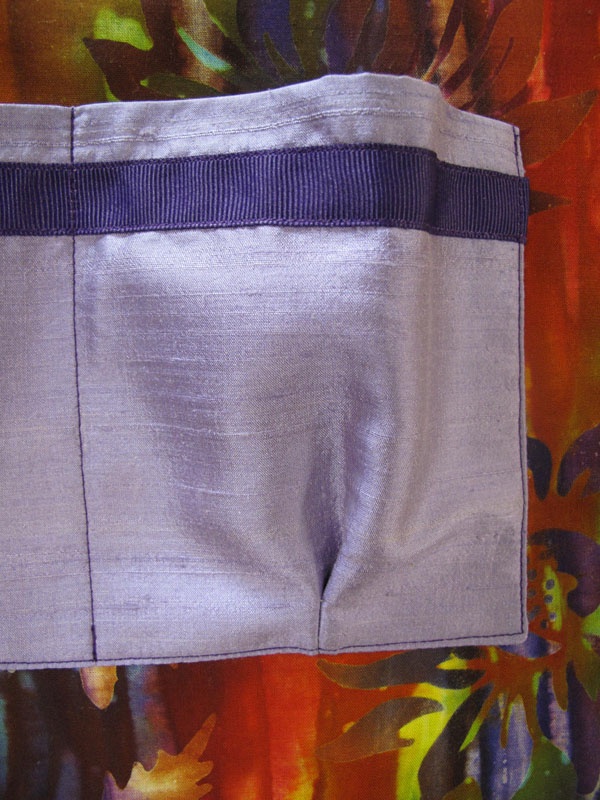
This forms a pouch, which makes it easier to slip in a glasses case or cell phone. I like to add small details to my bags, so I stitched on some grosgrain ribbon.

The grosgrain is also on the inside of the outer pockets, where it will never be seen (but it will make me smile when I remember it!)

The zippered pocket uses a welt method for inserting the zipper. It makes a nice, clean finish. I love all this color!

I wanted stiff, uncrushable handles, so I made some changes there. For each handle I cut two pieces of fabric and a 1" strip of Craf-Tex Lite, a stiff interfacing product Marcy stocks. It's fusible, so I simply wrapped one piece of fabric around it and fused.

I pressed the edges of the other strip of fabric an eighth of an inch narrower, sprayed it with adhesive, and finger pressed it to the other strip. I then edge stitched the handle with the narrower fabric facing up.

This process encases all of the raw edges without having to turn a tube of fabric, and the Craf-Tex makes it very durable.
To stabilize the bottom, Marcy recommends plastic canvas or cardboard. I prefer a really stiff bottom in my bags, and years ago I purchased a large piece of paperboard. It works great for this purpose. I add a layer of needlepunch so there's no "CLUNK" when I drop things into my bag.

I added feet to the bottom of the bag, which is why you see a hole drilled in the paperboard.

I ran into some difficulty when trying to pull the elastic through the casings on the front and back. My bodkin slipped off the elastic several times. I finally got it through. Instead of stitching in the ditch with the machine, I did it by hand. There's a ditch on the facing side, too, so the stitching needed to hide in both ditches.

Marcy used narrow ties to close the bag, which gave a nice finishing touch. I knew I wouldn't want to have to tie it shut, so I inserted a small magnetic snap in the center front and back facings.
The snap makes the bag a bit plainer, but with all of the images, color, and that fabulous lining, I think it looks just great! It won't be an everyday bag, but I can hardly wait to carry it to a museum, out to dinner, or on a shopping trip. Who knows? Maybe some day I'll get to carry it in Provence!

Your bag is a work of art. I hope someday you get to carry your gorgeous bag in Provence!
ReplyDeleteThanks Andrea!
ReplyDeleteWhat a fabulous bag, Dixie! And thank you for the details you so generously provided!
ReplyDeleteWhat a fun bag! And as always, your detailed explanations of the process are so helpful. (and thank you for the smiles) :) :) :)
ReplyDeleteOh how pretty and the bottom is so deep- thats a winner!
ReplyDeleteNicely done! So glad I got to see it in person -
ReplyDeleteWonderful job on the photos. I love how each detail of the bag contributes to the narrative....ah, a weekend in Provence...I can see it now. Thanks for the vision.
ReplyDeleteThat is an absolutely gorgeous bag. The painting is awesome. Wow.
ReplyDeleteOMG, I love this bag, it is STUNNING. As always I am in awe of your talent.
ReplyDeleteI would love to see and touch this beautiful bag in person. What a talent you have!
ReplyDeleteSuch a fun piece. I love all the attention to detail, even the bottom of the bag! Just fabulous!
ReplyDeleteThanks to all for your comments. I truly appreciate your feedback!
ReplyDeleteThat's a fabulous bag!
ReplyDeleteOoh La La! Gorgeous! You did a great great job mixing the fabrics/colors/screen prints - I'd buy this if I saw it hanging a boutique! Thank you for all the step by step photos, I love to see how things are put together!
ReplyDeleteThanks for posting at StitchersGuild - it brought me to your blog. I really like your work. This bag shows a lot of thoughtful and fun planning. It inspires me to think about bringing similar creativity to a bag for myself.
ReplyDeleteEnjoy using your bag!
Miriam
Hi Miriam! Thank you for visiting my blog, and for your comments. Part of my creative mission is to inspire others, so I'm glad it worked for you!
DeleteSo glad to have stumbled across your blog as your work is stunning. I adore the colours you choose and the designs are inspiring. Great bag, love it!
ReplyDeleteI'm also glad you stumbled across my blog. Thank you for your comments!
DeleteDixie, that is just gorgeous. I love the eiffel tower on the bottom. I have always been intimidated by silk screens, but you have done a fabulous job.
ReplyDeleteCarolyn, should you ever come north again, I'd be glad to play with silk screens with you. You wouldn't be intimidated at all!
ReplyDelete