
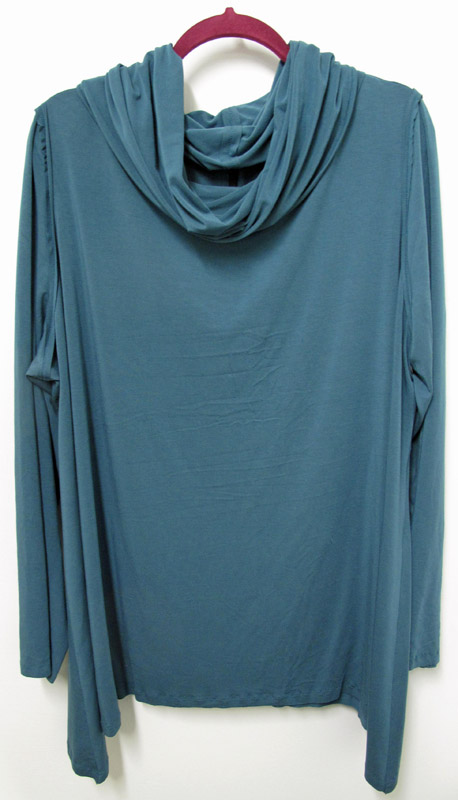
The tunic styles offered by Vogue 1261 appealed to me the moment I first set eyes upon them. I love an uneven hemline and unusual construction techniques that result in a trendy, edgy garment. In those aspects, this pattern is loaded. The loose fit looked promising for my plus size figure. I made the cowl neck version, and am very happy with the result.
The fabric is a luscious rayon jersey from Marcy Tilton. It has good two-way stretch, which is required in this version. The jersey doesn't curl, which was a big help in the cutting and construction processes, and necessary for smooth raw edges. The armscyes are cut quite close to the underarm, and there are no darts, so the dual direction stretch probably helps with the fit in that area. There are small folds under the arms, but I really didn't want to add darts, as there are so many other details in the design. I cut the largest size, and added about an inch to the underarm seams. I'm quite happy with the fit, although it's just a bit too wide across the chest. If/when I make it again, I'll probably subtract a little wudth through the chest, to help draw in the fit an inch or so.
The primary design details are seams sewn wrong sides together and twin needle stitched from the wrong side. I noticed on Pattern Review that several reviewers chose not to construct it this way, but I stuck with it and really like the look.
I did change how the center back seam is sewn. The instructions have you press the seams to the outside, butt the seams together, tape paper to them to stabilize the seam, and sew it with a twin needle from the inside of the garment. This didn't really sound too stable, and seemed a bit risky, so I sewed the seam with wrong sides together, reinforced it with Design Plus fusible stabilizing tape (a great product!) and a layer of Totally Stable (another great product!) to give it stability and give enough bulk for the twin needle stitching to look good. Since the seam was covered by interfacing and stabilizer, I drew a pencil line to guide me as I stitched. A lot of effort, but I think it was successful.

I toyed with just using a zig-zag stitch on the outside, but found it was flat and I rather liked the dimensionality added by the twin needle stitching. Removing the stabilizer was a long, tedious task that I performed in front of the TV. It took much care, as pulling hard on it distorted the stitches. Tweezers were an essential tool for this job! Several layers of Solvy might have been a better product choice.
Viola, the finished seam, outside and inside:

The pattern calls for narrow ribbon to be sewn over the seam allowances, allowing the stitching to show in between. I think that would be a great look but I knew I wouldn't find ribbon to match this fabric, so I simply trimmed the seam allowances to 3/8", and left them at that.
The reverse twin needle stitching is used on the center back collar seam, collar edge binding, and sleeve head seams. I skipped the Totally Stable on these seams, and the stitches formed nicely. Yards of fusible bias tape later, I finished the task.

The sleeve seams are a bit ragged because of the extra fabric resulting from easing the sleeve cap, but that just ups the funk factor.


I love the drape of this collar. It falls low enough that I can wear a short necklace, and it adds a bit of warmth without the close fit of a turtleneck. Since the fabric is quite stretchy, I stabilized the neck edge with fusible tape early on in the construction process. That prevented it from getting pulled out of shape, which would have easily occurred.
The sleeve and bottoms hems are single needle stitched 5/8" from the edge and left raw. This was a pleasureable way to finish the tunic, as the twin needle reversed seams had taken a lot of time. If the seams were all sewn to the inside, this would be an easy pattern to fit and sew. If constructed as directed, the difficulty is raised a notch or two. I'm glad I stuck with the original design, as I like wearing things that are a bit unusual. The tunic is easy to wear, the color is soothing, and I feel very comfortable in it. It is the first piece of my winter 6-pac, and I plan to wear it often!


